
EQ is a very daunting subject to anybody who’s starting to get into audio production. Not only do you have to understand what EQ is and how it works, but you also might find yourself having to navigate different EQs that have different interfaces and could confuse the hell out of you. Some have a bunch of knobs, some have visual representations of the EQ curve you’re using, and some have both.
The purpose of this blog post and video is to help you throw all that confusion out the window so you could open up almost any EQ plugin and have a decent grasp on what you’re looking at. The good news is that every EQ plugin is designed to perform very similar tasks, so this shouldn’t be too difficult.
If you’re still confused after reading this post, watch the video at the bottom of this page! Having a visual representation of what I’m talking about could clear some stuff up for you.
Controls You Should Always Look Out For
Although some EQs do offer some extra bells and whistles, there are 3 controls you can expect to find on most EQ plugins. Once you understand those and how they appear from EQ to EQ, you should be able to handle most EQ tasks, even if you’re opening an EQ plugin for the first time.
Gain
99% of EQs are going to have multiple gain knobs for each frequency band. Sometimes they may be labeled “dB” instead of “gain,” but what do they do?
The gain knob is probably the simplest control on an EQ. All it does is allow you to turn the volume of the band that you’re working on up or down. If you have a band set at 500 Hz, turning the gain knob up will make that frequency range louder, while turning it down will make that frequency range quieter.
Q
Also known as the “width” or “bandwidth” control, the Q value simply establishes the width of the band that you’re working on. Regardless of how it’s named, it’s most likely doing the same thing.
Just keep in mind that the wider the width of the band, the more the frequencies surrounding your center frequency will be affected by your EQ moves. On the other hand, narrow Q/width values will provide much more precise control and are perfect for cutting/taming annoying ringing frequencies in a signal.
If you’re working with an EQ that only has knobs on it, it’s likely that you’ll see a visual representation of different Q/width values at different ends of the knob. These will signify which way you have to turn the knob to get a narrow bandwidth, and which way you have to turn it to get a wide bandwidth.
Frequency
Sometimes labeled “kHz” or “Hz,” a frequency control simply selects the center frequency of the frequency range that you will be affecting. Have some really gross muddiness in the low mids that you want to cut out? Set it to around 250-300 Hz. Need to boost some highs? Set to a higher number in that frequency range.
Controls you Might Run Into
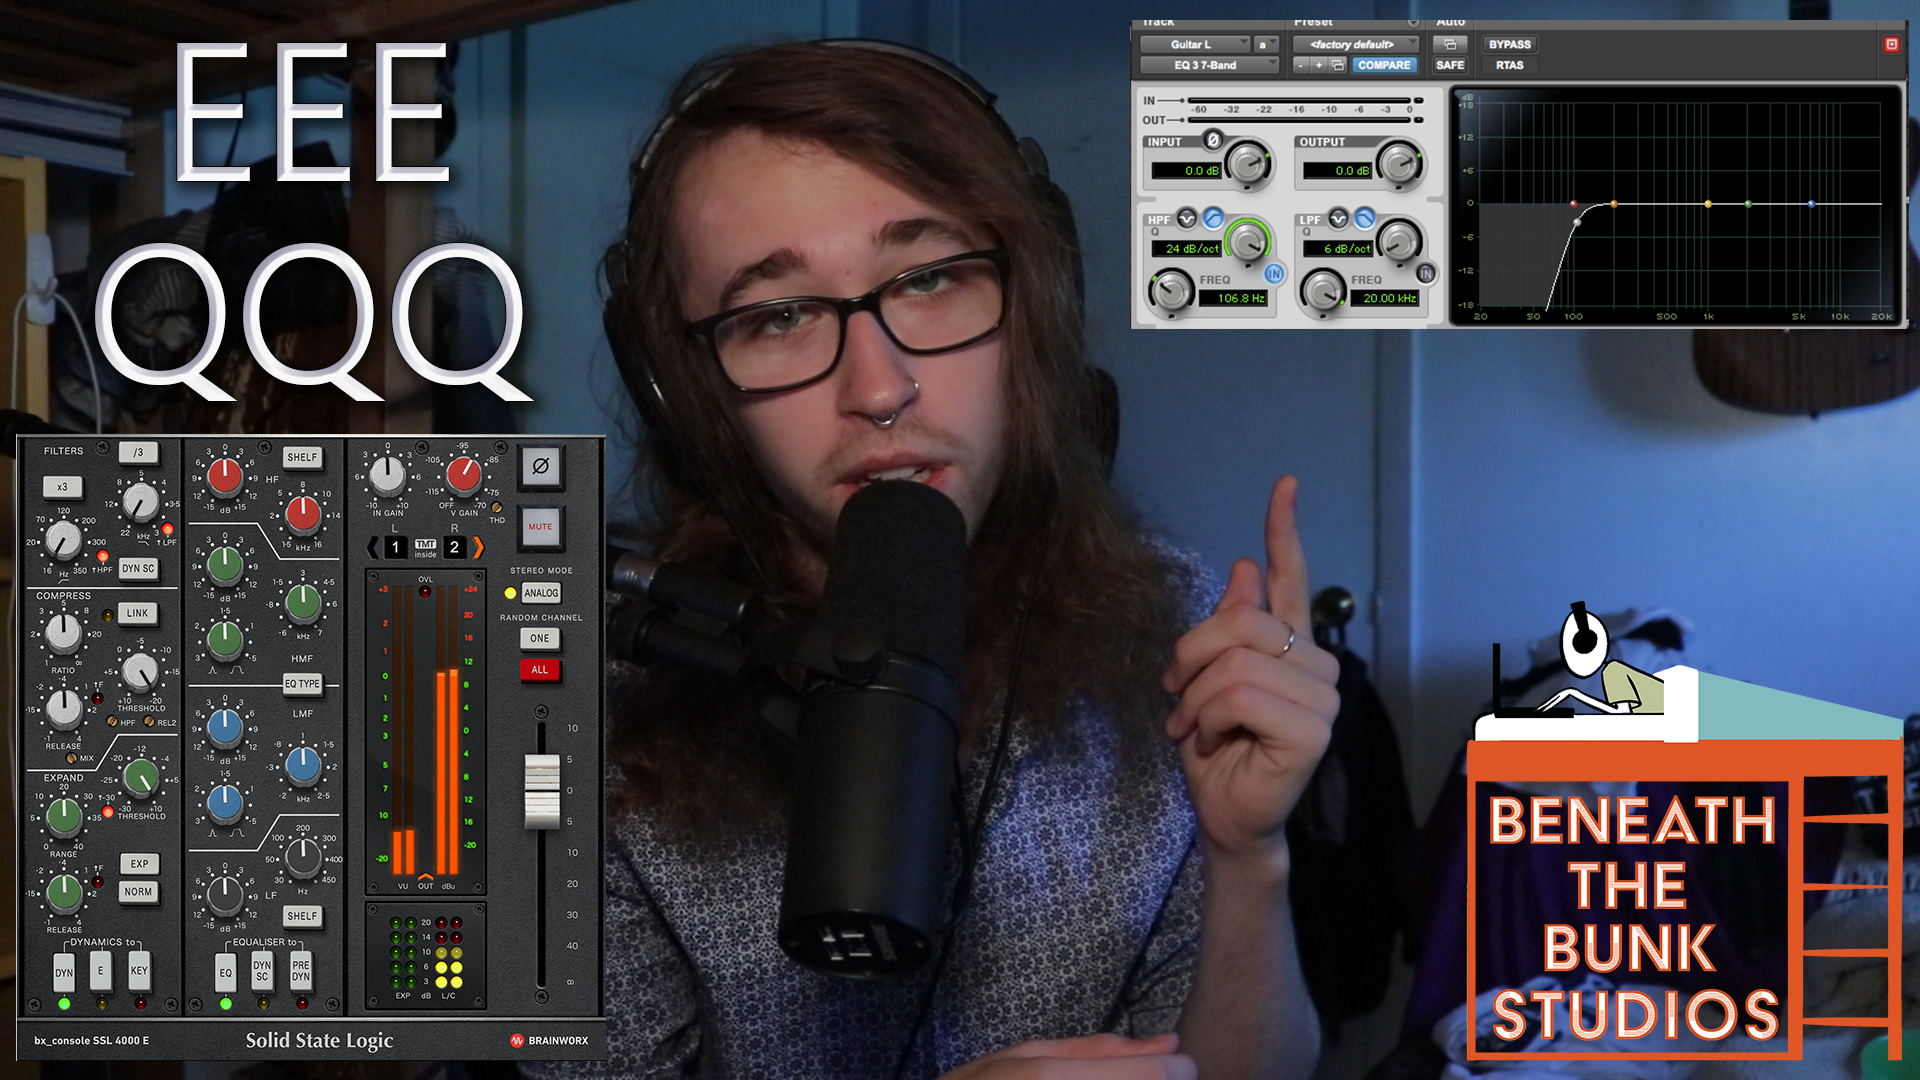
These are examples of some of the “bells and whistles” I mentioned earlier. They are most common on EQ plugins that emulate analog hardware, like the Brainworks SSL 4000 EQ Channel Strip or the Waves SSL Channel Strip, for example, and are worth understanding.
EQ Type
The Brainworx Channel Strip I just mentioned has this feature for its low frequency band.
Think of EQ type simply as a way of getting a different flavor out of your EQ. All it really does it modify the curves of the band so that different frequencies are getting affected differently than they otherwise would. Again, don’t overthink this. Instead, experiment with it and see if you can find different uses for each EQ type.
X3 or /3
These controls are most common on the filter section of an EQ that’s modeling analog hardware.
Let’s say your high-pass filter knob only reaches as high as 350 Hz, but you’re trying to make a lo-fi effect so you want it to go even higher than that. See if your EQ plugin has an X3 control and, if it does, you’ll be good to go. All it does is multiply the frequency that your high-pass filter is set to by 3 so that you can reach higher frequencies that you wouldn’t be able to reach otherwise.
If your EQ plugin has one, the /3 control works the exact same way in reverse. Let’s say you have a low-pass filter that only goes down 10 kHz, but for whatever reason you want it to go down to 4 kHz. Turn on your /3 control, set the low-pass to 12 kHz, and you’ll be good to go.
I hope you got something out of this! If you did, be sure to sign up for the Beneath the Bunk Studios Newsletter for updates on new blog posts and videos by clicking here. Also feel free to click/tap any of the circle icons below to follow me elsewhere.
Let me help inspire you to create stuff 🙂